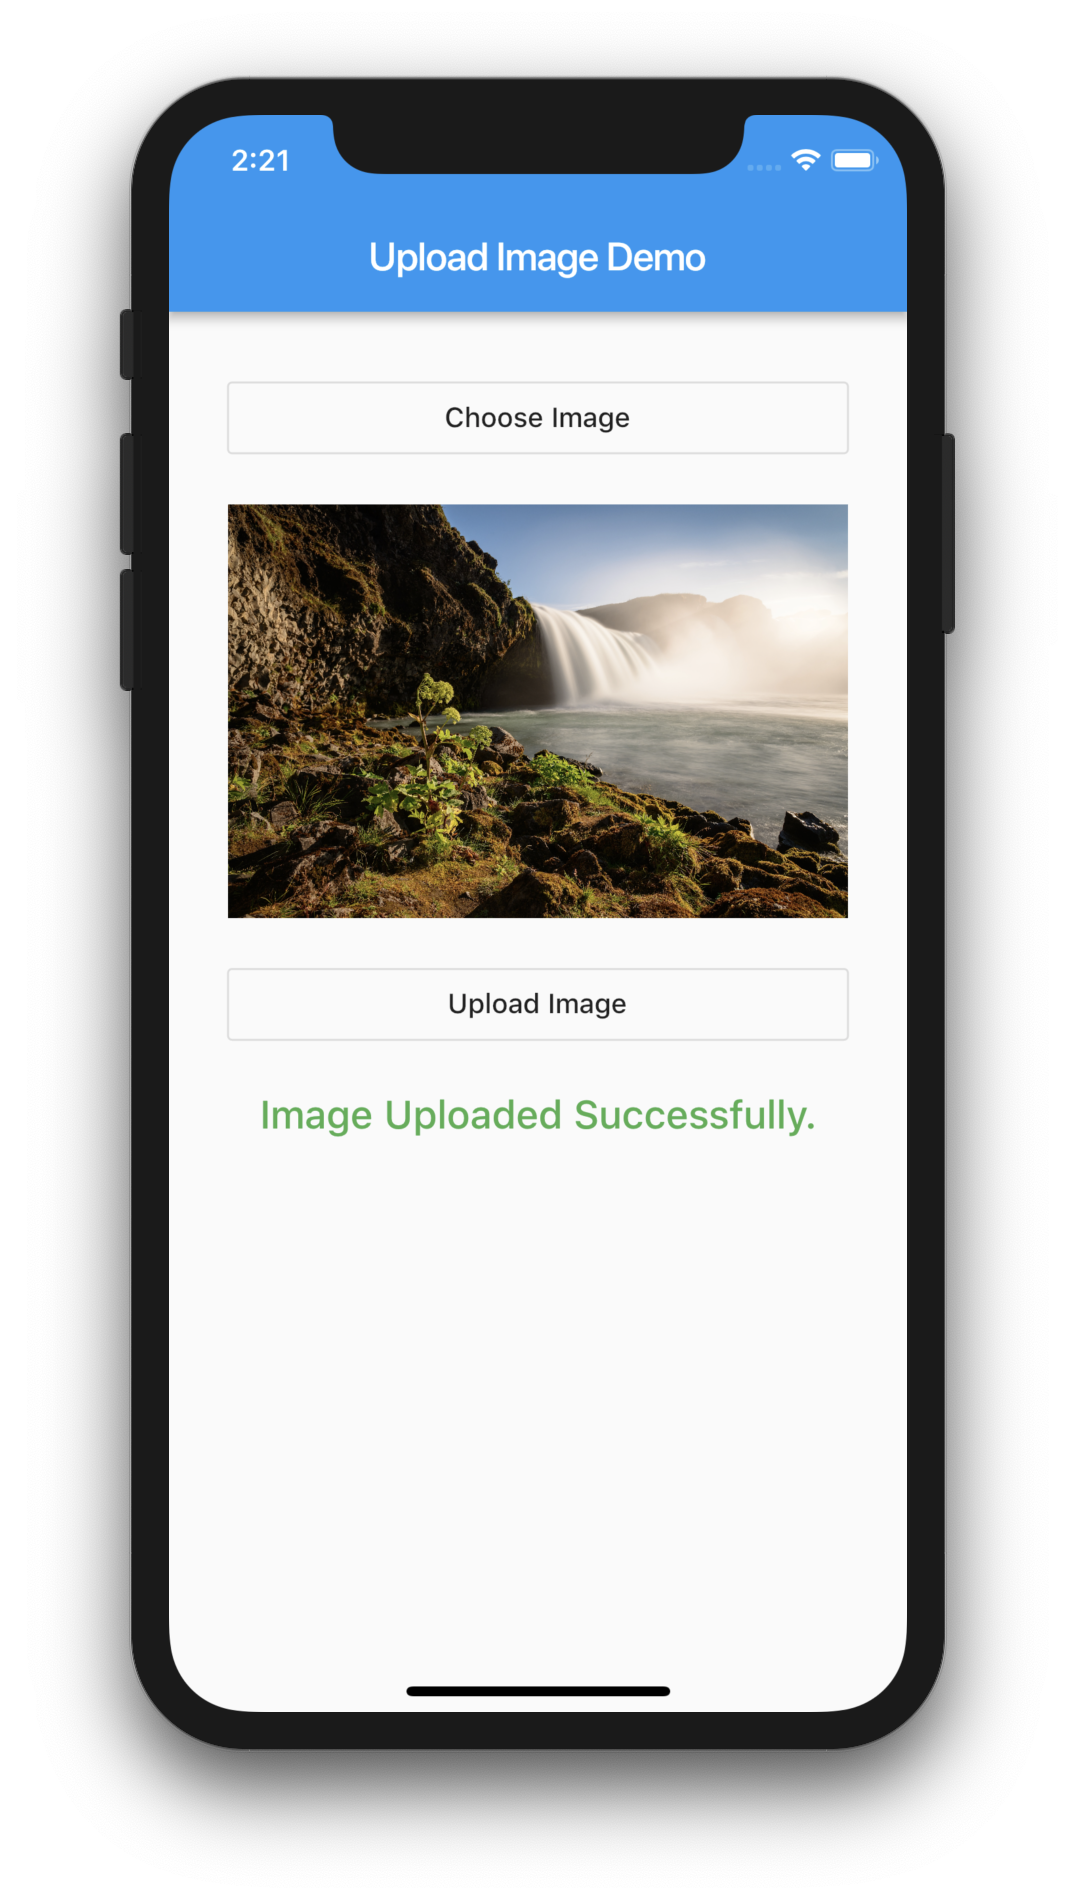
Today in this article we will see how we can upload image to a server using Flutter.
Watch Video Tutorial
Add Plugins
First thing we are going to need is the plugin for networking and plugin to select image from camera or gallery.
Add the below plugins in the pubspec.yaml file.
dependencies: flutter: sdk: flutter.... http: "0.11.3+17" image_picker: ^0.4.10... |
Import the needed dependencies
import 'dart:io';import 'dart:convert';import 'package:http/http.dart' as http;import 'package:image_picker/image_picker.dart'; |
Declare the variables
Future<File> file;String status = '';String base64Image;File tmpFile;String errMessage = 'Error Uploading Image'; |
Select Image from Gallery/Camera
The below method is invoked by the image_picker plugin to open the gallery and select an image.
chooseImage() { setState(() { file = ImagePicker.pickImage(source: ImageSource.gallery); });} |
Show Image
Upon coming back from the gallery after selecting an image, the following future builder will be triggered to which the above file variable is attached.
Widget showImage() { return FutureBuilder<File>( future: file, builder: (BuildContext context, AsyncSnapshot<File> snapshot) { if (snapshot.connectionState == ConnectionState.done && null != snapshot.data) { tmpFile = snapshot.data; base64Image = base64Encode(snapshot.data.readAsBytesSync()); return Flexible( child: Image.file( snapshot.data, fit: BoxFit.fill, ), ); } else if (null != snapshot.error) { return const Text( 'Error Picking Image', textAlign: TextAlign.center, ); } else { return const Text( 'No Image Selected', textAlign: TextAlign.center, ); } }, ); } |
The above code will be triggered when user selects an image from the gallery, then we will set the data in a temporary file and we will also convert it to a base64 String.
Upload File
Once we have the file to upload, we will use the http library to upload the file.
The below two methods does that. We will be sending the image base64String as “image” and the file name as “name” in a json object.
startUpload() { setStatus('Uploading Image...'); if (null == tmpFile) { setStatus(errMessage); return; } String fileName = tmpFile.path.split('/').last; upload(fileName);}upload(String fileName) { http.post(uploadEndPoint, body: { "image": base64Image, "name": fileName, }).then((result) { setStatus(result.statusCode == 200 ? result.body : errMessage); }).catchError((error) { setStatus(error); });} |
If we get a proper result, we will show the response from the server in a Text in the UI, otherwise we will display an error.
Server Side
For this example, we are using php as the server side scripting.
For the image upload, the code will look like this.
<?php $image = $_POST['image']; $name = $_POST['name']; $realImage = base64_decode($image); file_put_contents($name, $realImage); echo "Image Uploaded Successfully.";?> |
Note: Make sure you have proper write permissions in the folder where you store the image, otherwise server will throw error.
Complete Code
import 'package:flutter/material.dart';import 'dart:io';import 'dart:convert';import 'package:http/http.dart' as http;import 'package:image_picker/image_picker.dart';class UploadImageDemo extends StatefulWidget { UploadImageDemo() : super(); final String title = "Upload Image Demo"; @override UploadImageDemoState createState() => UploadImageDemoState();}class UploadImageDemoState extends State<UploadImageDemo> { // static final String uploadEndPoint = 'http://localhost/flutter_test/upload_image.php'; Future<File> file; String status = ''; String base64Image; File tmpFile; String errMessage = 'Error Uploading Image'; chooseImage() { setState(() { file = ImagePicker.pickImage(source: ImageSource.gallery); }); setStatus(''); } setStatus(String message) { setState(() { status = message; }); } startUpload() { setStatus('Uploading Image...'); if (null == tmpFile) { setStatus(errMessage); return; } String fileName = tmpFile.path.split('/').last; upload(fileName); } upload(String fileName) { http.post(uploadEndPoint, body: { "image": base64Image, "name": fileName, }).then((result) { setStatus(result.statusCode == 200 ? result.body : errMessage); }).catchError((error) { setStatus(error); }); } Widget showImage() { return FutureBuilder<File>( future: file, builder: (BuildContext context, AsyncSnapshot<File> snapshot) { if (snapshot.connectionState == ConnectionState.done && null != snapshot.data) { tmpFile = snapshot.data; base64Image = base64Encode(snapshot.data.readAsBytesSync()); return Flexible( child: Image.file( snapshot.data, fit: BoxFit.fill, ), ); } else if (null != snapshot.error) { return const Text( 'Error Picking Image', textAlign: TextAlign.center, ); } else { return const Text( 'No Image Selected', textAlign: TextAlign.center, ); } }, ); } @override Widget build(BuildContext context) { return Scaffold( appBar: AppBar( title: Text("Upload Image Demo"), ), body: Container( padding: EdgeInsets.all(30.0), child: Column( crossAxisAlignment: CrossAxisAlignment.stretch, children: <Widget>[ OutlineButton( onPressed: chooseImage, child: Text('Choose Image'), ), SizedBox( height: 20.0, ), showImage(), SizedBox( height: 20.0, ), OutlineButton( onPressed: startUpload, child: Text('Upload Image'), ), SizedBox( height: 20.0, ), Text( status, textAlign: TextAlign.center, style: TextStyle( color: Colors.green, fontWeight: FontWeight.w500, fontSize: 20.0, ), ), SizedBox( height: 20.0, ), ], ), ), ); }} |
Source Code
Complete source code is available here.

Pingback: #Flutter Tutorial – Upload Image to Server using PHP (coderzheaven.com) | Host your Website
how to upload multipart form data
i have tried in android 8.1, but image cannot display after i pick from the gallery ?
Did you add the permissions in the AndroidManifest.
Pingback: #Google's Flutter Tutorial - Upload Image to Server using PHP (coderzheaven.com) - TutsFx
ImagePicker.pickImage used in chooseImage() is deprecated. Whats the other way to do it?
Would you please check the latest library documentation?
This is how to get the image file: var file = await ImagePicker().getImage(source: ImageSource.camera);
Alter the upload method to: upload(PickedFile imageFile)
But i have an exception: Content size exceeds specified contentLength. 65986 bytes written while expected 645. What maybe wrong?
can you create new way because Package of image_picker: is changed don’t work with last version http
Pingback: Flutter : Entrypoint doesn't contain a main function – Flutter Fixes
Pingback: #Google's Flutter Tutorial – Upload Image to Server using PHP (coderzheaven.com) - The Small World
BRO PLEASE SHARE RIGHT WORKING CODES OR SHARE COMPLETE PROJECT SO CAN SHARE IMAGES OF ERROS”
I HAVE CORRECTED IT FINALLY IT SHOULD BE LIKE THIS ”
import ‘package:flutter/material.dart’;
import ‘package:get/get.dart’;
import ‘package:titfamily/controller/auth_controller.dart’;
import ‘package:titfamily/screens/home_screen.dart’;
import ‘package:titfamily/screens/login_screen.dart’;
import ‘package:titfamily/screens/splash_page.dart’;
void main() {
return runApp(MyApp());
}
class MyApp extends StatelessWidget {
final authController = AuthController();
@override
Widget build(BuildContext context) {
return GetMaterialApp(
debugShowCheckedModeBanner: false, // Hide debug banner
home: SplashPage(
child: FutureBuilder(
future: authController.tryAutoLogin(),
builder: (contect, authResult) {
if (authResult.connectionState == ConnectionState.waiting) {
return Center(
child: CircularProgressIndicator(
valueColor: AlwaysStoppedAnimation(Colors.red)),
);
} else {
if (authResult.data == true) {
return HomeScreen();
}
return LoginScreen();
}
}),
),
);
}
}