


Let’s start with Swipe to Delete.
To Swipe and delete a row, each row in the list should be made up of Dismissible Widget. The Dismissible widget has inbuilt listeners for Swipe Gestures.
Swipe to delete & Pull to Refresh
Watch Video Tutorial
Swipe to Delete
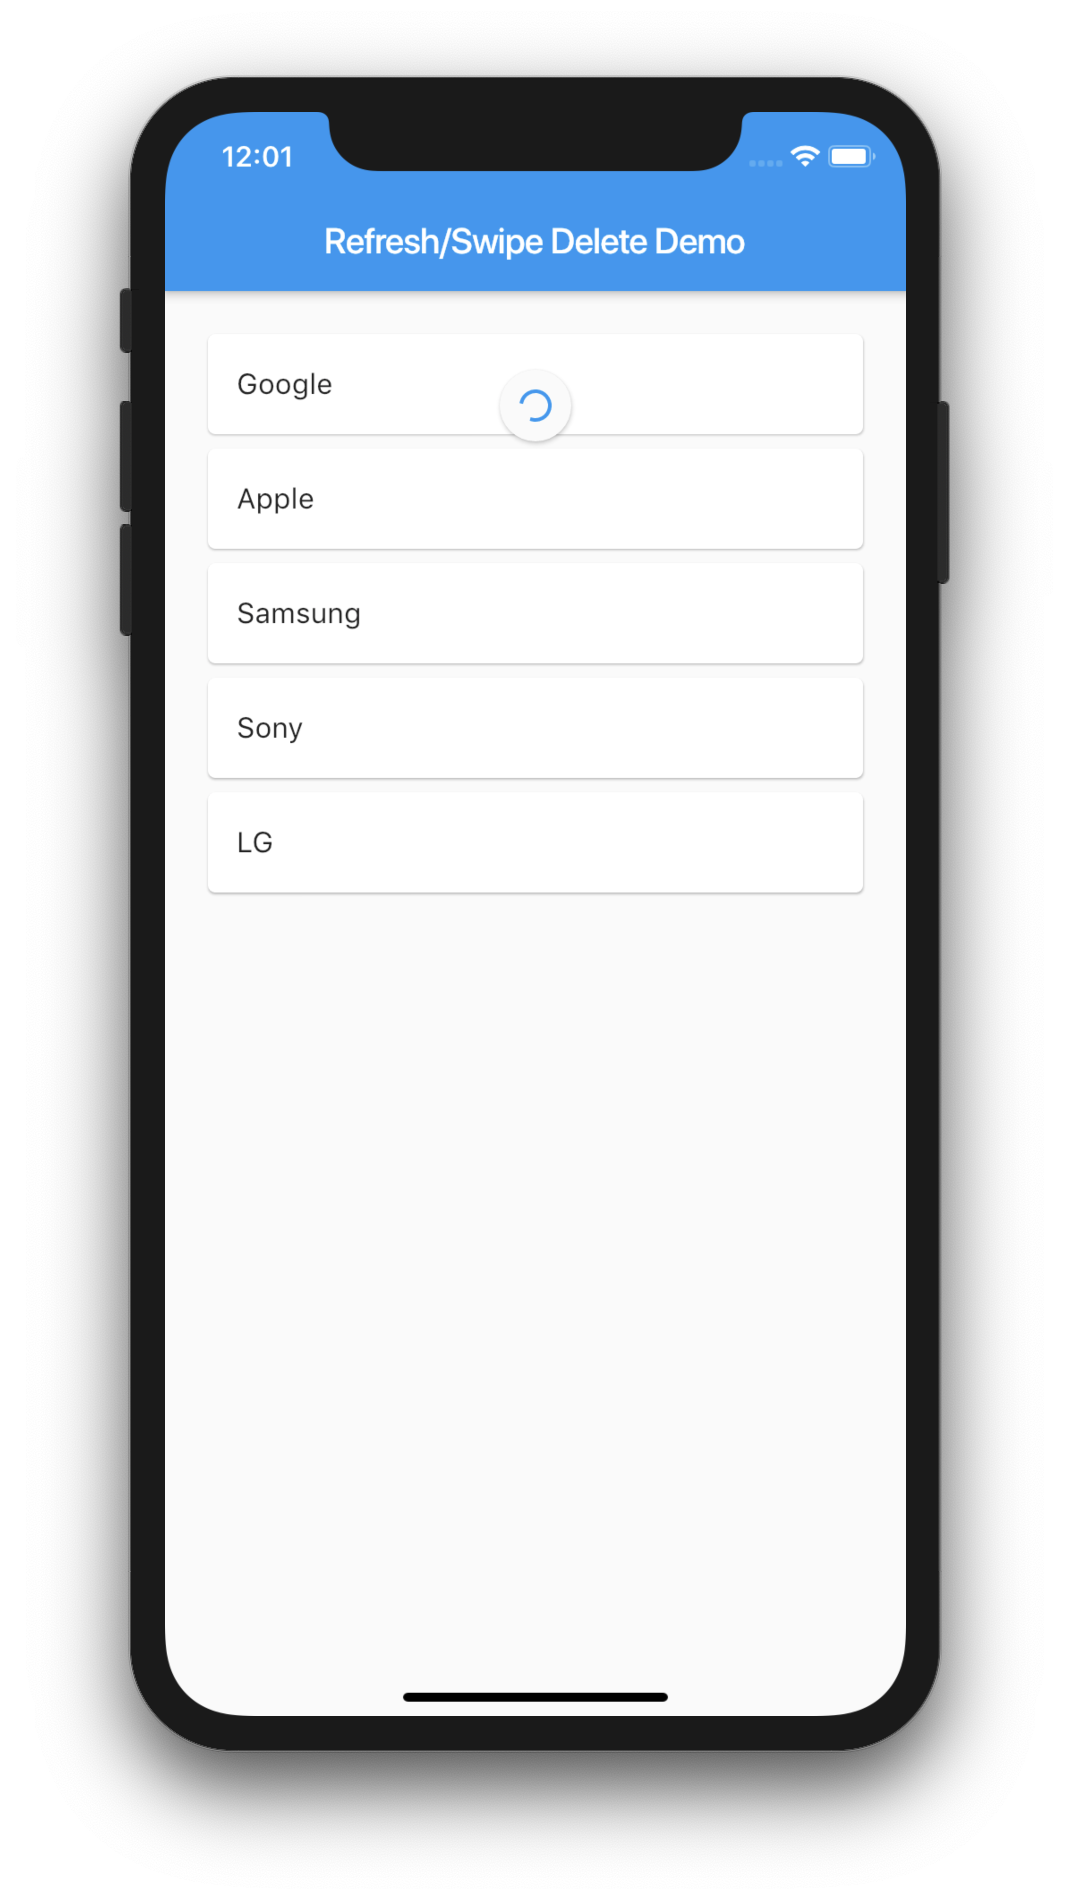
Here we will have a list of Strings which are a list of companies.
Each row in the List is a Dismissible widget. The onDismissed will be triggered
when the user swipes. We need to remove the corresponding row from the list data-source accordingly, otherwise it will result in the error being the Dismissible widget not removed from the tree when you manipulate the datasource again. So this is a very important step.
List<String> companies;@overridevoid initState() { super.initState(); companies = List(); addCompanies();}/* Initialize the list with Some company names */addCompanies() { companies.add("Google"); companies.add("Apple"); companies.add("Samsung"); companies.add("Sony"); companies.add("LG");}/* Remove the data from the List DataSource */removeCompany(index) { setState(() { companies.removeAt(index); });}/* Undo the Deleted row when user clicks on UNDO in the SnackBar message */undoDelete(index, company) { setState(() { companies.insert(index, company); });}/* Show Snackbar when Deleted with an action to Undo the delete */showSnackBar(context, company, index) { Scaffold.of(context).showSnackBar(SnackBar( content: Text('$company deleted'), action: SnackBarAction( label: "UNDO", onPressed: () { undoDelete(index, company); }, ), ));}/* Give a background to the Swipe Delete as a indicator to Delete */Widget refreshBg() { return Container( alignment: Alignment.centerRight, padding: EdgeInsets.only(right: 20.0), color: Colors.red, child: const Icon( Icons.delete, color: Colors.white, ), );}Widget list() { return ListView.builder( padding: EdgeInsets.all(20.0), itemCount: companies.length, itemBuilder: (BuildContext context, int index) { return row(context, index); }, );}Widget row(context, index) { return Dismissible( key: Key(companies[index]), // UniqueKey().toString() onDismissed: (direction) { var company = companies[index]; showSnackBar(context, company, index); removeCompany(index); }, background: refreshBg(), child: Card( child: ListTile( title: Text(companies[index]), ), ), );}@overrideWidget build(BuildContext context) { return Scaffold( appBar: AppBar( title: Text(widget.title), ), body: Container( child: list(), ), );} |
Pull to Refresh
To add Pull to Refresh, Wrap the List with the RefreshIndicator Widget and implement the onRefresh callback.The code will change like this.
/* Mimic a delay and add a random value to the list */Future<Null> refreshList() async { await Future.delayed(Duration(seconds: 10)); addRandomCompany(); return null; } ... RefreshIndicator( key: refreshKey, onRefresh: () async { await refreshList(); }, child: list(), ) |
Complete Code
The Complete source code will look like this.
import 'package:flutter/material.dart';import 'dart:math';class SwipeDeleteDemo extends StatefulWidget { SwipeDeleteDemo() : super(); final String title = "Refresh/Swipe Delete Demo"; @override SwipeDeleteDemoState createState() => SwipeDeleteDemoState();}class SwipeDeleteDemoState extends State<SwipeDeleteDemo> { // List<String> companies; GlobalKey<RefreshIndicatorState> refreshKey; Random r; @override void initState() { super.initState(); refreshKey = GlobalKey<RefreshIndicatorState>(); r = Random(); companies = List(); addCompanies(); } addCompanies() { companies.add("Google"); companies.add("Apple"); companies.add("Samsung"); companies.add("Sony"); companies.add("LG"); } addRandomCompany() { int nextCount = r.nextInt(100); setState(() { companies.add("Company $nextCount"); }); } removeCompany(index) { setState(() { companies.removeAt(index); }); } undoDelete(index, company) { setState(() { companies.insert(index, company); }); } Future<Null> refreshList() async { await Future.delayed(Duration(seconds: 10)); addRandomCompany(); return null; } showSnackBar(context, company, index) { Scaffold.of(context).showSnackBar(SnackBar( content: Text('$company deleted'), action: SnackBarAction( label: "UNDO", onPressed: () { undoDelete(index, company); }, ), )); } Widget refreshBg() { return Container( alignment: Alignment.centerRight, padding: EdgeInsets.only(right: 20.0), color: Colors.red, child: const Icon( Icons.delete, color: Colors.white, ), ); } Widget list() { return ListView.builder( padding: EdgeInsets.all(20.0), itemCount: companies.length, itemBuilder: (BuildContext context, int index) { return row(context, index); }, ); } Widget row(context, index) { return Dismissible( key: Key(companies[index]), // UniqueKey().toString() onDismissed: (direction) { var company = companies[index]; showSnackBar(context, company, index); removeCompany(index); }, background: refreshBg(), child: Card( child: ListTile( title: Text(companies[index]), ), ), ); } @override Widget build(BuildContext context) { return Scaffold( appBar: AppBar( title: Text(widget.title), ), body: RefreshIndicator( key: refreshKey, onRefresh: () async { await refreshList(); }, child: list(), ), ); }} |
Thanks for reading.
Please leave your valuable comments below the post.
Watch the Youtube tutorial to see everything in action and Subscribe for more videos.
Pingback: Google's Flutter Tutorial - Pull to Refresh, Swipe to Delete in ListView - TutsFx